Advanced Linux Shell Scripting for DevOps Engineers with User management

I am a DevOps Engineer, my name is Devesh Choudhary. I like to build and deploy the applications by following all the DevOps principals with complete security.
DAY 5 - #90DaysOfDevOps Challenge
LOOPS IN BASH ( FOR, WHILE, UNTIL )
Loops are a fundamental part of any programming language, and bash is no exception. Loops allow you to execute a block of code repeatedly until a certain condition is met. There are three types of loops in bash:
For loopsiterate over a list of items.While loopsiterate as long as a certain condition is met.Until loopsiterate as long as a certain condition is not met.
FOR LOOP:- In Bash, we can use a for loop to iterate over a list of items or a range of values.
Here's an example of a for loop that iterates over a list of items:
#!/bin/bash

  fruits=("apple" "banana" "orange" "grape")

  for fruit in "${fruits[@]}"
  do
      echo "I like $fruit"
  done
This script will output:
  I like apple
  I like banana
  I like orange
  I like grape
we can also use a range expression to iterate over a sequence of numbers. Here's an example that prints the numbers from 1 to 5:
  #!/bin/bash

  for i in {1..5}
  do
      echo $i
  done
This script will output:
  Copy code1
  2
  3
  4
  5
WHILE LOOP:- In Bash, we can use a
whileloop to repeatedly execute a block of code as long as a certain condition is true. The basic syntax of awhileloop in Bash is as follows:while condition do # commands to be executed doneHere,
conditionis a test expression that is evaluated before each iteration of the loop. If the condition is true, the commands within the loop are executed. If the condition becomes false, the loop is exited, and the program continues with the next line of code after thedonekeyword.Here's an example of a
whileloop that counts from 1 to 5:#!/bin/bash counter=1 while [ $counter -le 5 ] do echo $counter ((counter++)) doneIn this script, the
countervariable is initialized to 1. The loop continues as long as the condition$counter -le 5is true, which means the value of thecounteris less than or equal to 5. Inside the loop, the current value of thecounteris echoed, and then thecountervariable is incremented using((counter++)).The output of this script will be:
  1
  2
  3
  4
  5
we can modify the condition and the commands within the loop to suit your specific needs.
until loop:=
In Bash, we can use an until loop to repeatedly execute a block of code until a certain condition becomes true. The until the loop is the opposite of the while loop. It continues executing the loop as long as the condition is false. Once the condition evaluates to true, the loop is exited, and the program continues with the next line of code after the done keyword.
The basic syntax of an until loop in Bash is as follows:
until condition
do
    # commands to be executed
done
Here, condition is a test expression that is evaluated before each iteration of the loop. If the condition is false, the commands within the loop are executed. If the condition becomes true, the loop is exited.
Here's an example of an until loop that counts from 1 to 5:
#!/bin/bash

counter=1

until [ $counter -gt 5 ]
do
    echo $counter
    ((counter++))
done
In this script, the counter variable is initialized to 1. The loop continues until the condition $counter -gt 5 becomes true, which means the value of counter is greater than 5. Inside the loop, the current value of counter is echoed, and then the counter variable is incremented using ((counter++)).
The output of this script will be:
1
2
3
4
5
we can modify the condition and the commands within the loop to fit your specific requirements.
Let's come to the task part:=
Write a bash script createDirectories.sh that when the script is executed with three given arguments (one is the directory name and second is the start number of directories and third is the end number of directories ) it creates a specified number of directories with a dynamic directory name.
here is the file wrote:
    #!/bin/bash

    # Checking for the number of arguments passed is correct
    if [ "$#" -ne 3 ]; then
      echo "Usage: $0 <directory_name> <start_number> <end_number>"
      exit 1
    fi

    # Extracting arguments to variables
    dir_name="$1"
    start="$2"
    end="$3"

    # Create directories with dynamic names
    for ((i="$start"; i<="$end"; i++)); do
      dir="$dir_name$i"
      mkdir -p "$dir"
    done

    echo "Directories are created successfully"

Movie directory :

2 . Create a Script to backup all your work done till now.
first, create a
.shfile using an editor.then create the source and backup directories.
   !/bin/bash

   # Define the backup source directory
   src_dir=/home/devesh_singh/loop/new_file

   # Define the backup destination directory
   tgt_dir=/home/devesh_singh/loop/backups

   # Define the backup filename
   curr_timestamp=$(date "+%Y-%m-%d-%H-%M-%S")
   backup_file=$tgt_dir/$curr_timestamp.tgz

   # Create the backup file
   echo "Taking backup on $curr_timestamp"

   tar czf $backup_file --absolute-names $src_dir

   # Print a message indicating that the backup was created
   echo "Backup completed"
In this script, the
tarcommand is used with the optionsczfto create a compressed tar archive (tgzformat) of the source directory ($src_dir). The--absolute-namesoption is used to preserve the absolute path of the files and directories in the backup.The script then prints a message indicating the timestamp of the backup, creates the backup file with the specified name, and finally, prints a message indicating that the backup is completed.

Read About Cron and Crontab, to automate the backup Script
Cron is a time-based job scheduler in Unix-like operating systems. It allows users to schedule and automate the execution of commands or scripts at specific intervals or times. Cron jobs are commonly used for tasks such as system maintenance, backups, and periodic data processing.
Cron uses a configuration file called crontab (short for "cron table") to define the schedule and commands for the jobs. Each user on a Unix-like system can have their own crontab file, which contains a list of entries specifying the jobs to be executed.
Here's a brief overview of how to use cron and crontab to automate a backup script:
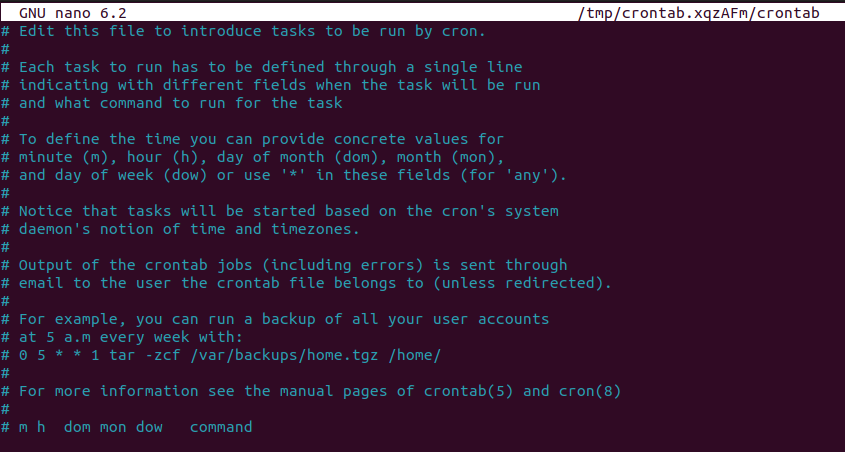
Edit the crontab file: To create or edit your crontab file, you can use the following command:
crontab -eThis will open the crontab file in your default text editor.
Define the schedule: In the crontab file, each line represents a separate cron job entry. The format of a cron job entry consists of six fields, specifying the minute, hour, day of the month, month, day of the week, and the command to be executed. For example, to schedule a backup script to run every day at 3 AM, you can add the following line to your crontab file:
0 3 * * * /path/to/backup-script.shIn this example, "
0 3 *" means the script will run at 3:00 AM every day.Save and exit the crontab file: Once you've defined your cron job entry, save the file and exit the text editor. The changes will be automatically applied.
Verify the crontab: You can view the list of your scheduled cron jobs by using the command:
crontab -lThis will display the contents of your crontab file.
Monitor the execution: Cron will automatically execute the specified script according to the defined schedule. You can monitor the execution and check the logs or output generated by the script to ensure everything is running as expected.
It's important to ensure that the backup script you're using is properly configured and tested before scheduling it with Cron. Additionally, make sure you have appropriate permissions to execute the script and access the required files or directories.
Remember that cron runs in the background and executes commands without any user interaction. Therefore, it's crucial to be cautious when scheduling and automating tasks to avoid any unintended consequences.
USER MANAGEMENT:=
User management in Linux is the process of creating, modifying, and deleting user accounts. User accounts are used to identify and authenticate users on a Linux system. They also control what resources users can access.
There are three main ways to manage users on a Linux system:
Graphical user interface (GUI) tools
Command-line tools
Editing configuration files directly
GUI tools are the easiest way to manage users. They are typically provided by the distribution's desktop environment. For example, GNOME provides the Users and Groups tool, and KDE provides the Users and Permissions tool.
Command-line tools are more powerful than GUI tools, but they can be more difficult to use. The most common command-line tools for managing users are:
useradd- Create a new user accountusermod- Modify an existing user accountuserdel- Delete a user accountpasswd- Change a user's password
Configuration files can be edited directly to manage users. However, this is not recommended unless you are familiar with the Linux filesystem and configuration files.
The following are some of the most common tasks that are performed as part of user management:
Creating user accounts
sudo useradd user_name

Modifying user accounts
  # This command will change the comment field for the user account named username. The comment field is a free-form text field that can be used to store any information about the user, such as their full name, job title, or department.
  usermod -c comment username

  #This command will change the home directory for the user account named username. The home directory is the directory where the user's files are stored.
  usermod -d home_directory username

  #This command will add the user account named username to the group named group_name. Groups are used to control access to files and resources on a Linux system.
  usermod -g group_name username

  #This command will change the default shell for the user account named username. The shell is the program that the user will use to interact with the Linux system.
  usermod -s shell_name username

  #This command will change the user ID (UID) for the user account named username. The UID is a unique number that identifies the user account.
  usermod -u uid username
Deleting user accounts
sudo userdel user_name

Changing user passwords
sudo passwd username
Locking and unlocking user accounts
  # l for locking
  passwd -l username
  # -u for unlock
  passwd -u username
Setting user permissions
  chmod u=rwx,go=rx /path/to/directory
  # "chmod" is the command used to change file permissions."u=rwx" sets the permissions for the owner (user) of the directory. In this case, it grants read, write, and execute permissions."go=rx" sets the permissions for the group (g) and others (o) to read and execute.
Adding users to groups
usermod -a -G group_name username

Removing users from groups
gpasswd -d <username> <groupname>
"Thanks for reading! I hope you have a wonderful day. I'd love to hear your thoughts on this topic. Please leave a comment below. If you found this post helpful, please consider subscribing to my blog."
Thanks for reading! I'll see you next time.


